Project
For my final project, I thought about making a whole assortment of things, from fans to cabinets. Throughout it all I always had a different project lurking in the back of my mind. I had turned this idea down because I had too many, I didn't need another. Eventually I gave in and started planning how I was going to build my final project, a bass guitar.
Planning |
Right from the start I knew this was going to be a difficult project and I would struggle along the way. This I knew, but I still wanted to have my own custom made instrument that didn't cost $5,000. I began my planning with thinking of the design and stylistic choices of the bass. I hind sight, I can see how this was a problem, but at the time I wasn't worried about the fine details.
|
|
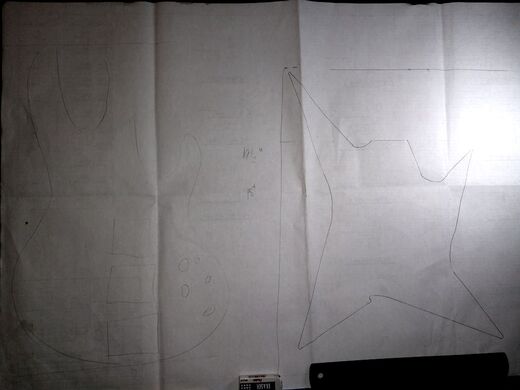
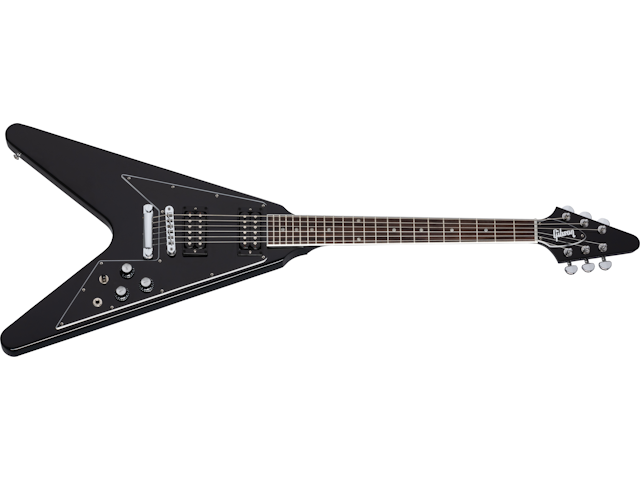
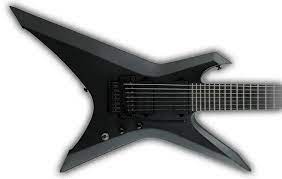
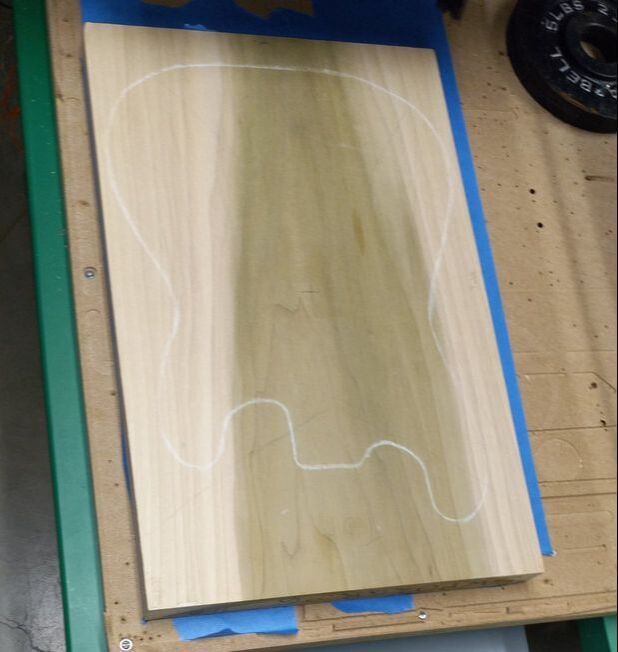
DesignMy father is a project manager at Endres manufacturing. This meant he was able to get me some scrap design paper. I then used this paper to sketch and trace my current bass's body, and from there design how my own would look. I took inspiration from the flying V at first, but later redesigned a more X style body shape.
|
Fusion 360
The only CAD software I used during this project was Fusion 360, and this was a risk of it's own. In Big Idea, we are encouraged to use Inventor because that is what the teachers are more familiar with. I knew about this, but we use Fusion 360 to create the tool paths used by the router. So I made my design on Fusion so I didn't have to move my file and face possible issues due to the size. There was also the fact that my family already used Fusion 360 for other things, so I could use that profile and work on my project from home (which was a life saver). The first thing I did on my CAD software was learning how to use it and make it do what I wanted it to do. Some YouTube and Inventor and Fusion both being Adobe products made this task easier.
First design
|
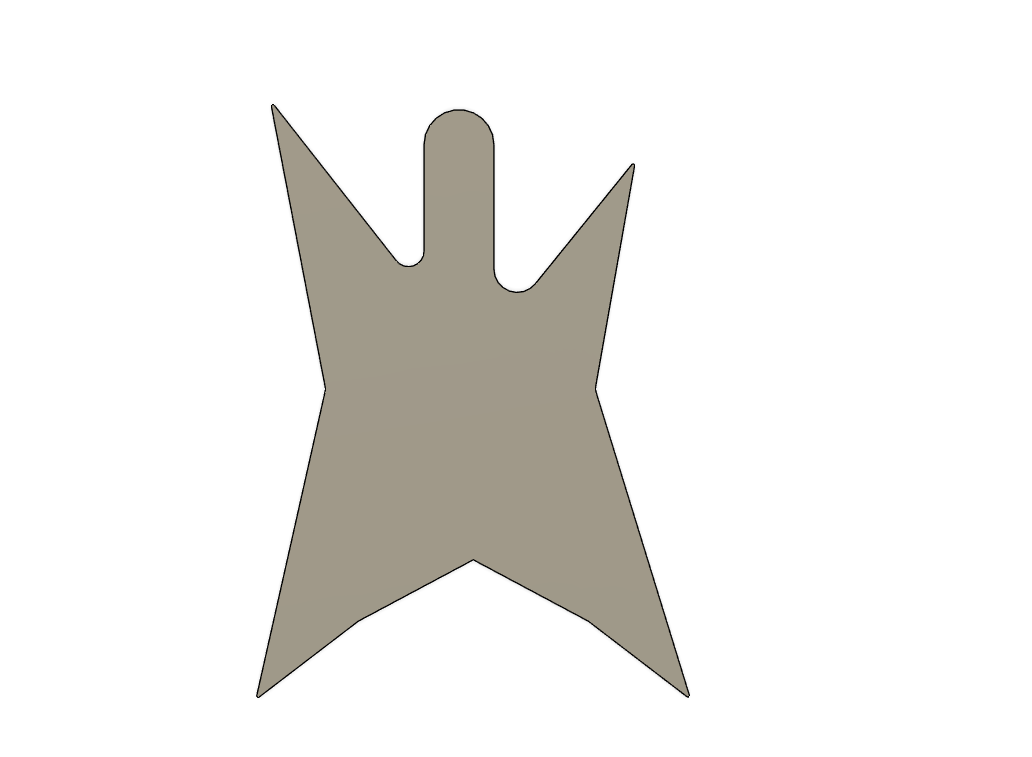
My goal with fusion was to just create a 3D version of the sketch I made. This was more difficult than I thought it was going to be, because my sketch was rough and I wouldn't be able to take measurements from it. This was a bit tricky, but I just gave up on making a 100% accurate 3D model and went with something similar, but different. I ended up making a body with a X over all shape and the V bottom of the flying V. The over all shape is very sharp and this was intentional because I thought it made it look cooler, and it was more similar to the bodies used in the music I enjoy (rock and metal).
|
|
The Neck
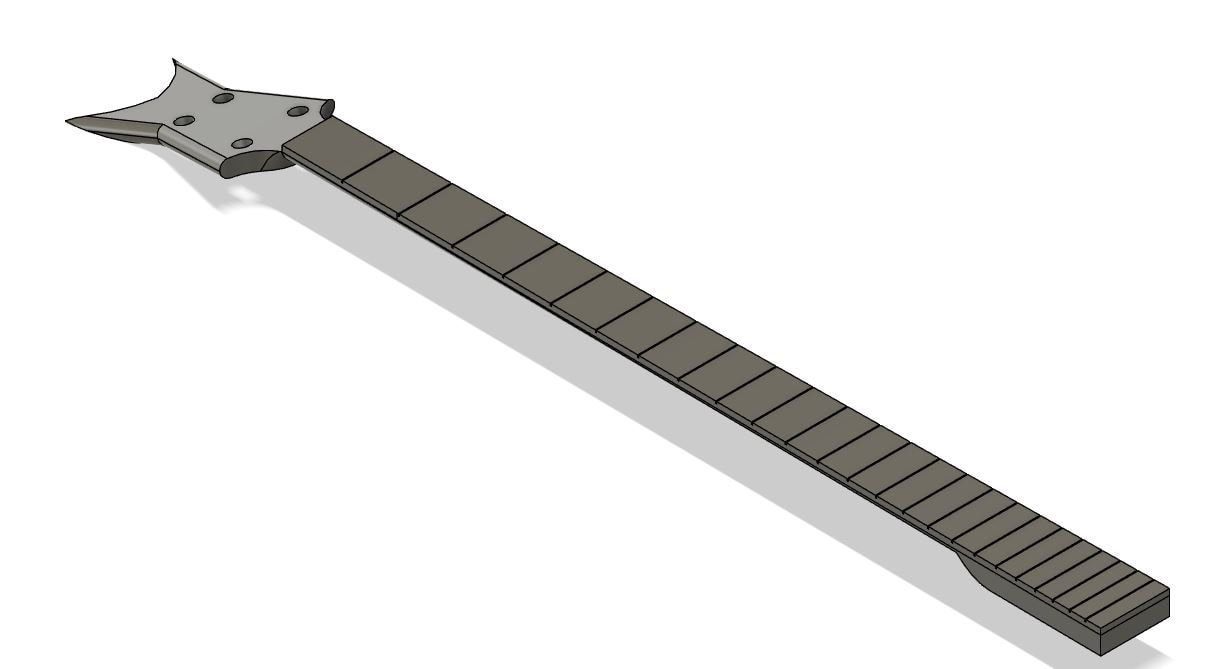
|
Same time as when I was making the body, I was designing the neck, head & the fret board that would cover it.
|
Back To The Body
|
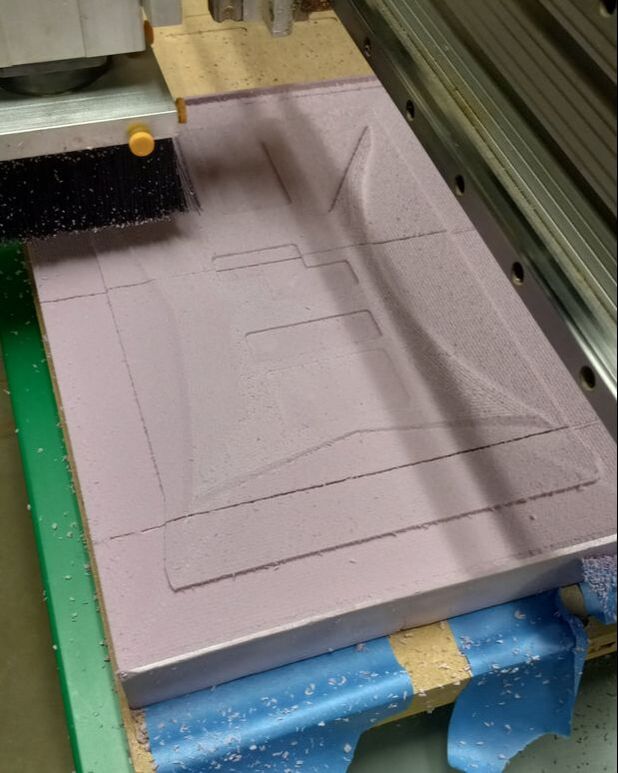
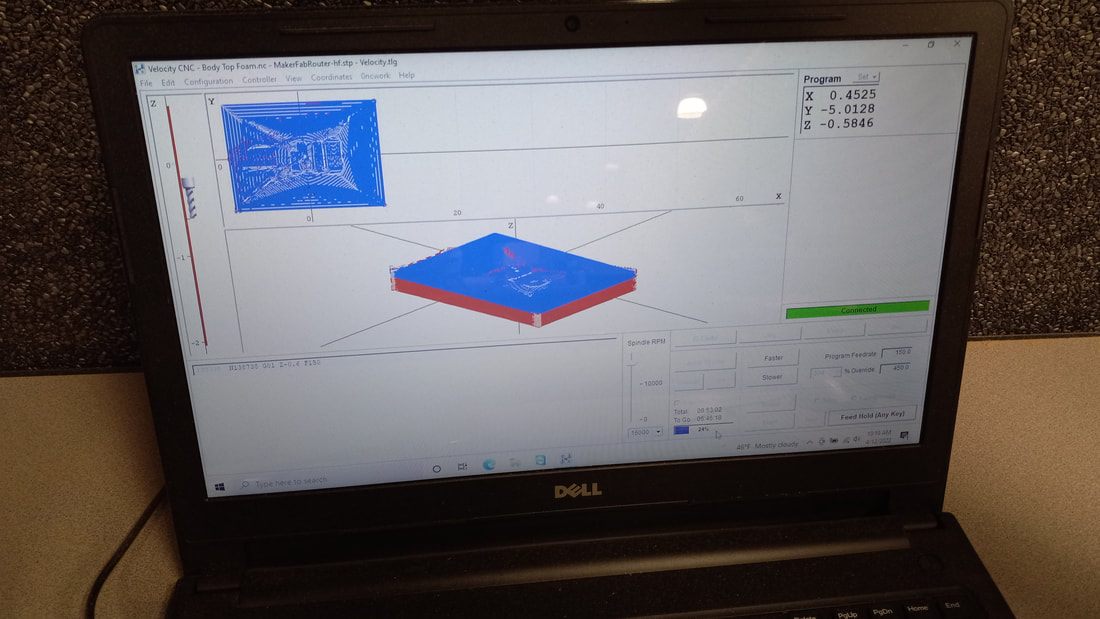
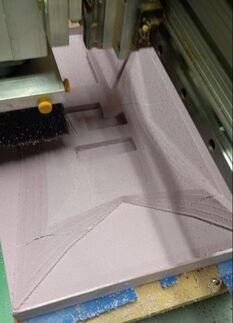
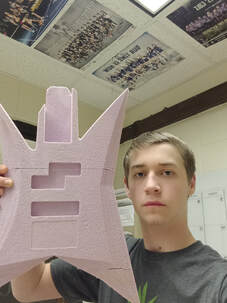
The first piece that I cut using the CNC Router was a block of foam to test and to see if my G-Code would work for the wood. This took many hours and I wasn't able to capture the entire cutting process. When I came in the next day, the foam body was cut and was a good test and I learned about what I had to improve on.
|
|
Foam Neck
|
|
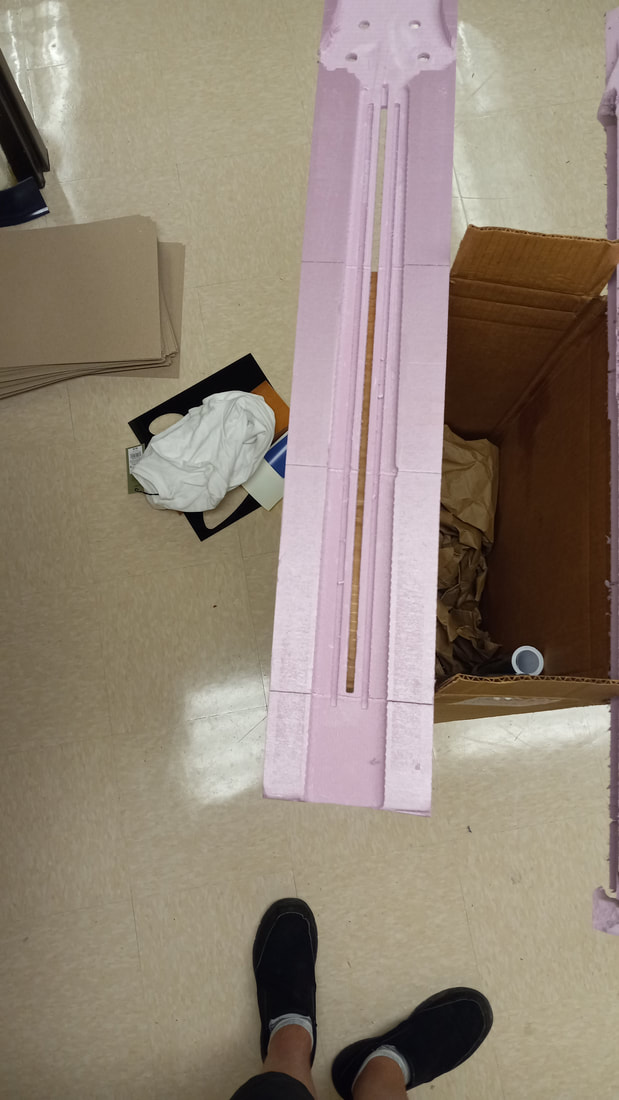
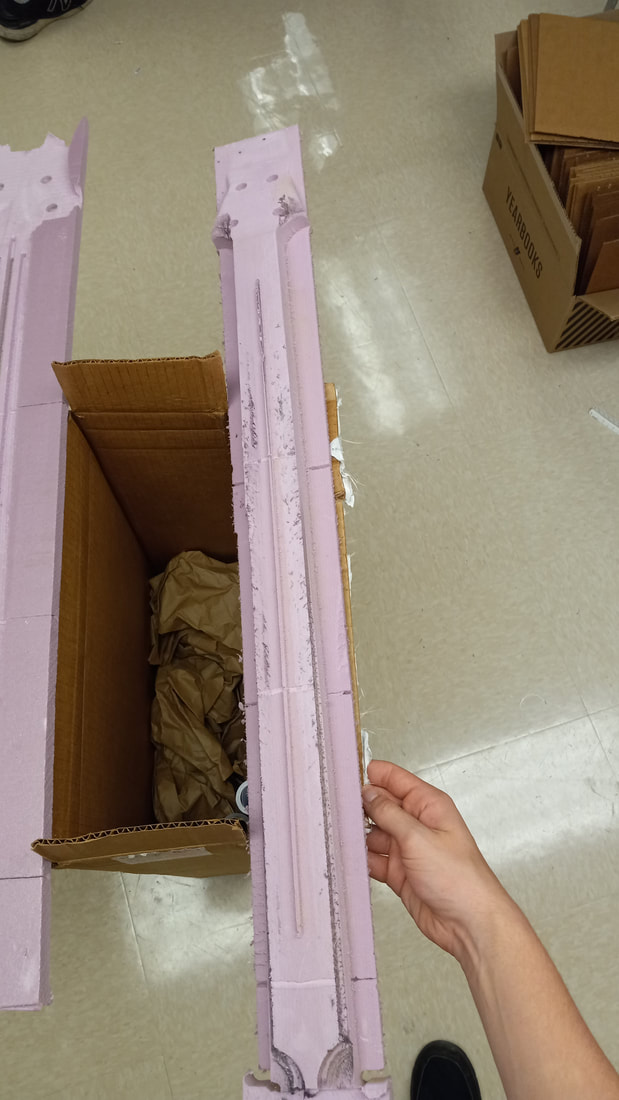
My neck was the next piece to be cut and this meant that I had to finish it's actual CAD design. This ended up being rather difficult because I couldn't figure out how I wanted the head to be shaped. Eventually I chose one and decided to see how it looked in foam. Only one problem with that, both of my attempts to cut a foam neck were failures and neither worked. All I was able to test on them was to see if my truss rod and my stiffening rods fit into their slots. Luckily they did and I spent some more time staring at the design of my neck.
|
Wood Arrives
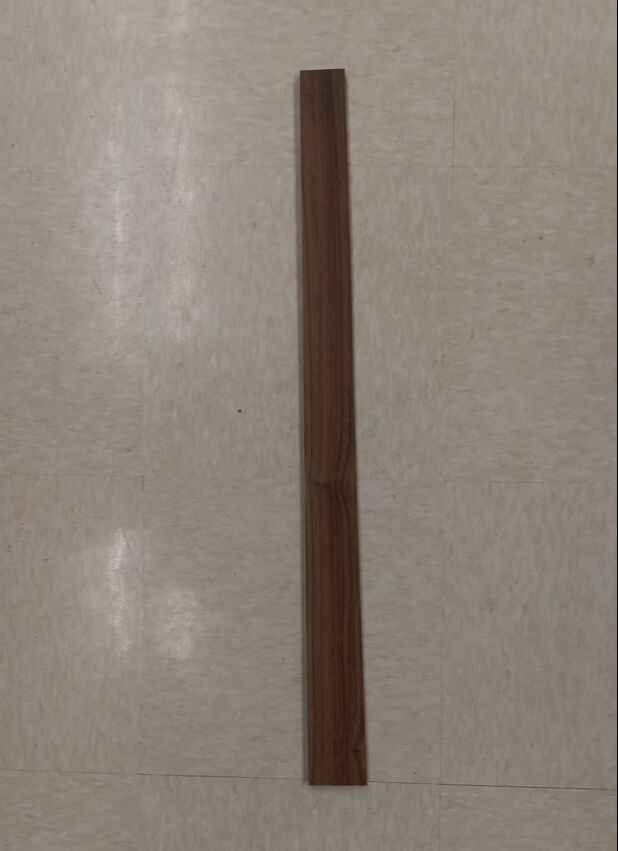
Wood was one of the few things that I wasn't really thinking about during my design process. A family friend who is a carpenter said that he had some wood that would work and probably look cool too. Then I learned that he was old barn wood that wasn't even the right size for what I needed. So, I turned to the internet and looked up wood types for electric basses and guitars. I ended up selecting a poplar body, two pieces of mahogany for the neck, and a Granadillo fretboard.
|

|
|
The fretboard was the first piece that I cut out of my actual material and it was very stress enduing. We tried to test a different piece, but this wood was warped and wouldn't stay on the router with the double sided tape. So we were running out of time and the previous "test" didn't calm my nerves. Despite this, I put the actual piece on the router and Mr. Willauer had a secret weapon for keeping it in place. Tape both the table and the piece, then super glue the tape together. Even this almost didn't work and we had to hold the ends down when the router was a safe distance away and wouldn't cut our fingers off. After the longest 5 minutes of my life, the fret board was off and in my hands. Another surprise was a new cut in the router bed and a sinking feeling of regret in my stomach.
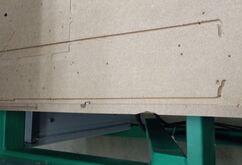
Never the less, this was my first big step toward the end of this project and I had hope of finishing this colossal task I decided to choose.
Wood Body Cut
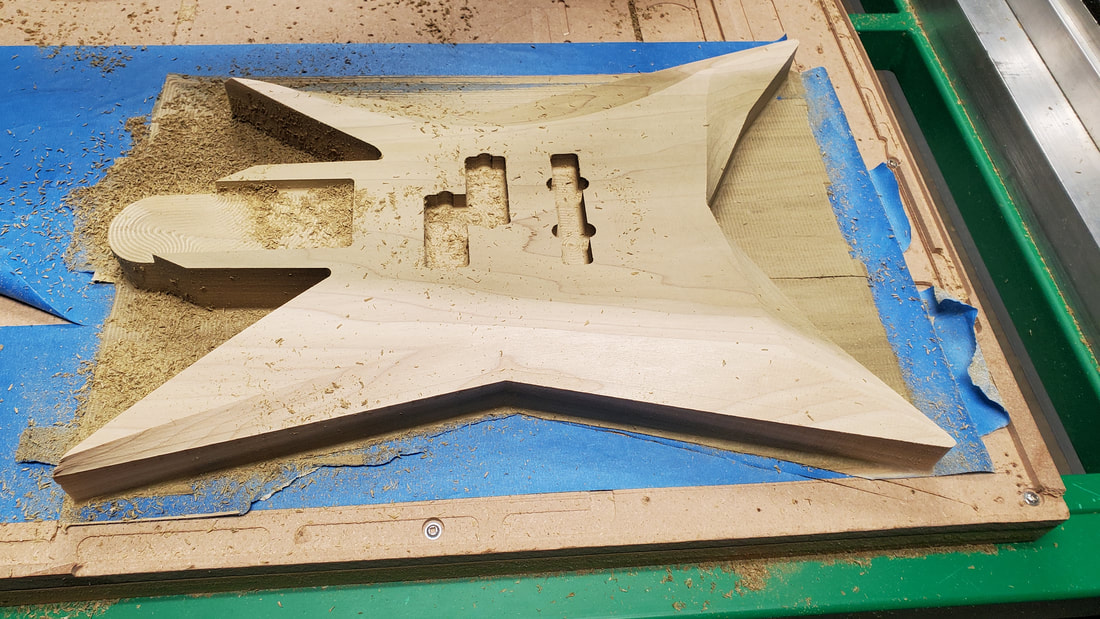
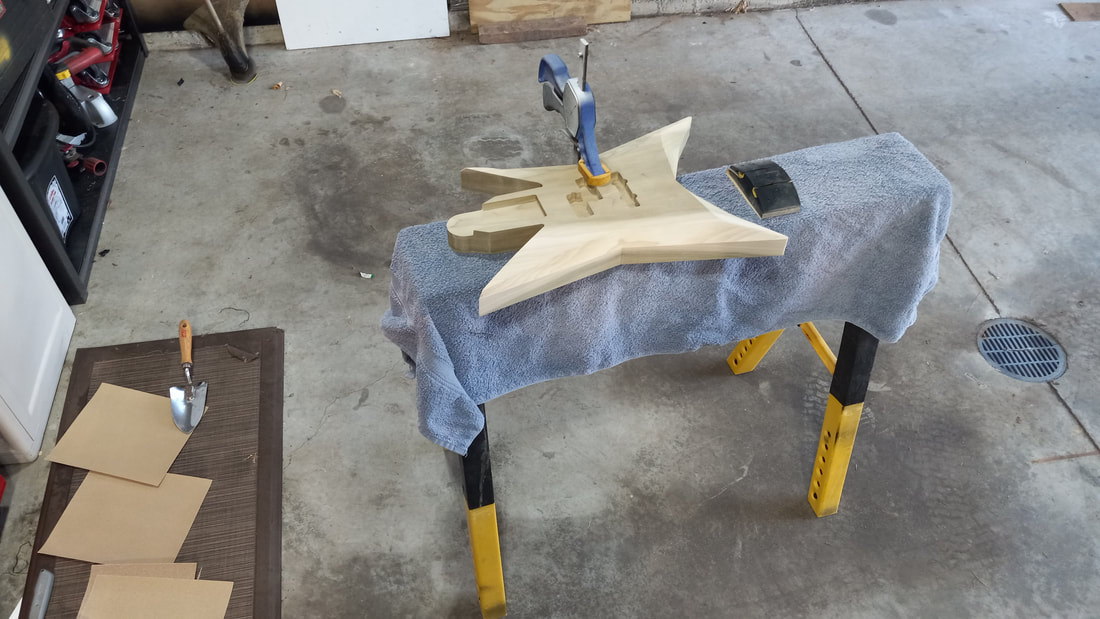
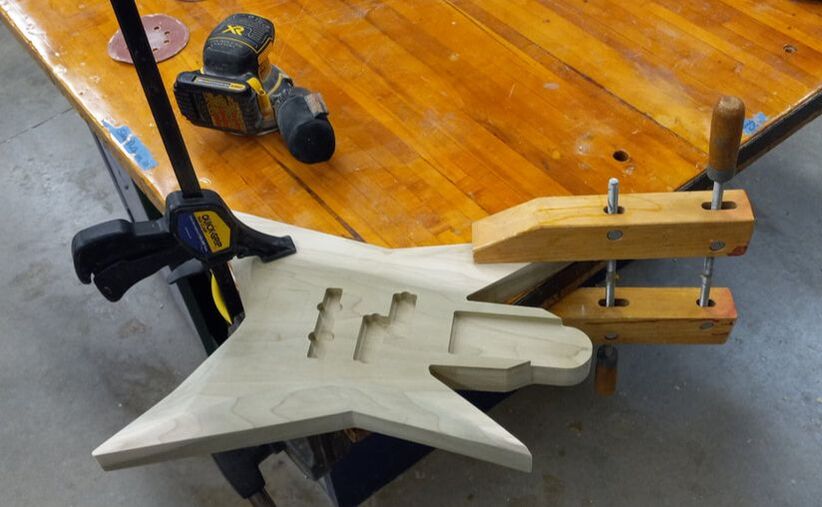
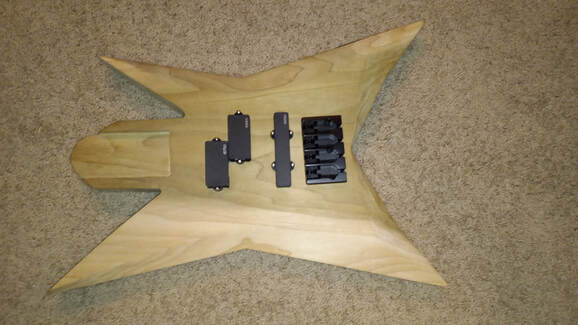
After cutting the fretboard, it was time to cut the body out of actual wood and I was feeling pretty confident after the foam body and the improvements I made. I first cut my holes in the back of the bass and then flipped it to cut the top holes and the shape. Only issue was that there wasn't a flat end router bit that was the size I needed for the top of the body. So we ended up using a router bit with a tip, but was the right length and was more secured in the chuck. This was fine, it just meant that the flat parts of my design wouldn't be flat. That didn't concern me because my pickups just needed to be level. and the neck slot could be sanded and flattened.
|
|
As happy as I was to have my body in my hands, there was something in the code that kept a little bit of wood in my pockets and around the bottom edge of the body (as can be seen in the picture on the left). Because of this my next week of work was sanding off those rough edges and getting everything flat and smooth. I first used the wood shop's drum sanders to get rid of the left over on the edges, then at home I took a sanding block, sandpaper and some elbow grease

|
|
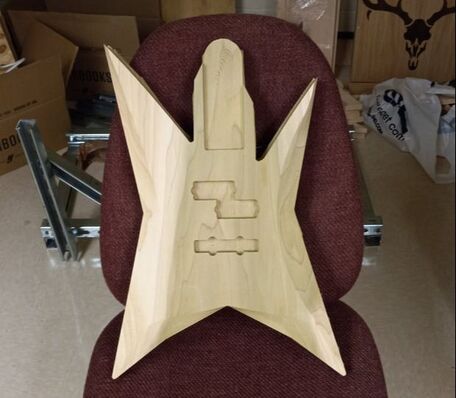
Problem with the elbow grease and a sanding block is that you cant get tight places. I tried to sand all the edged evenly, but I could only sand the sides and could sand both the top and the bottom (I did try, as can be seen by comparing both edges in the picture on the left). So when I was back in class, I grabbed a disk sander from the wood shop and used the power of the power tool to make my previous day's effort seem useless.
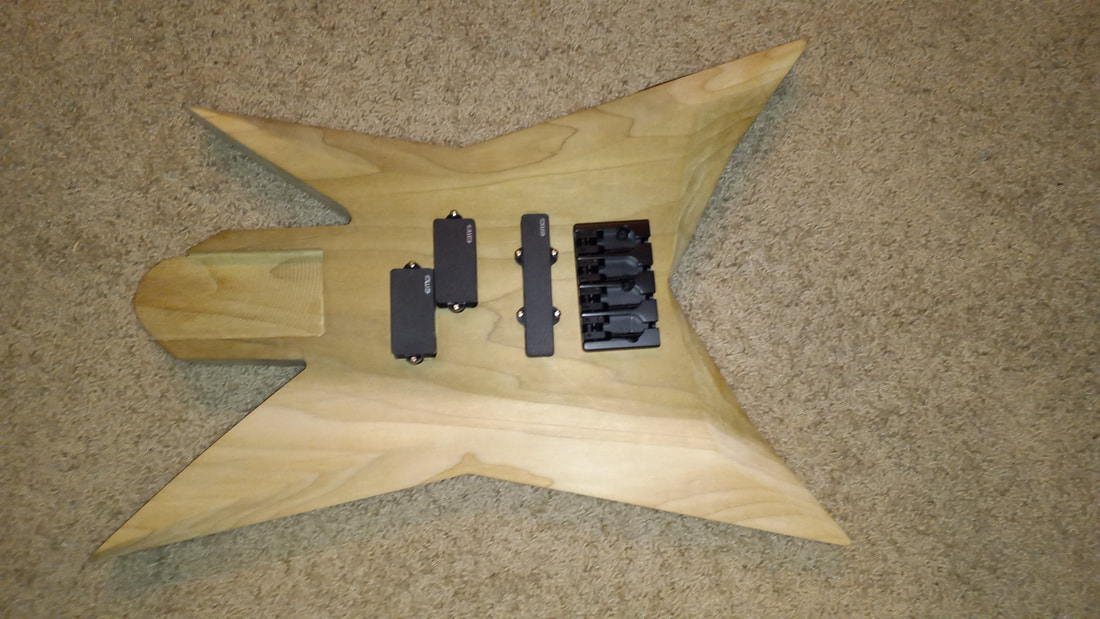
With the sanding, I had an issue that my pickups wouldn't fit, and nothing was small enough to reach inside. So, much to my own dismay, I sanded the pickups themselves. Nothing about this felt right, but it had to be done, and gladly, it worked out and my agony wasn't in vein.
That wasn't the only nail biting thing I had to do though. I also had to drill holes from the pickups holes, to the electronic pocket. This wasn't as bad, though the thought of the irreversible damage was always on my mind.
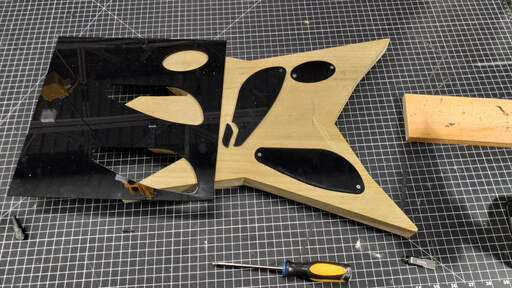
Laser Time
To cover my holes the back of the bass, I bought some black acrylic because I thought it would look cool. To cut the correct shape into the acrylic, I used Fusion 360 and projected just the holes, then sent these as DXF files to Illustrator. Then in illustrator I colored these holes so the laser would cut the acrylic and I would have very accurate covers for my holes.


Neck Problems (Again)
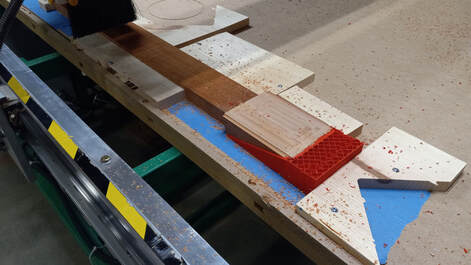
The next iteration of impromptu neck work came in the form of stock material. I wasn't able to find any block of wood which fit the requirements I needed. So I instead got two pieces of mahogany, one for the neck portion, the other for the head. Then I joined these two at a 15 degree angle. Problem was, I was making the cuts and double miter cuts and ending up with a 30 degree angle which was much more that I intended. Next I glued the two pieces together and let them dry. I come in the next day and realize that I glued them wrong and had to cut the two pieces apart again. Then I glued them together properly (still at a 30 degree) and let them dry. Next day I come in after realizing my mistake with angles and have the head cut off (Mr. Willauer is the one doing all the cuts (sorry)). Then I flipped the head to it was actually at 15 degrees and let it dry once again. Then the final issue was that the head was only connected to the neck with wood glue, and I still had to cut it on the router. Mr. Willauer tasked me with making a 3D printed ramp to keep the head supported when cutting. This worked and I had my neck cutting the next week, but not before another issue. Mr. Willauer planed the head to reduce cutting time, but somewhere there was an issue and too much stock was cut. So we glued a spare piece onto the head and cut from there.

|
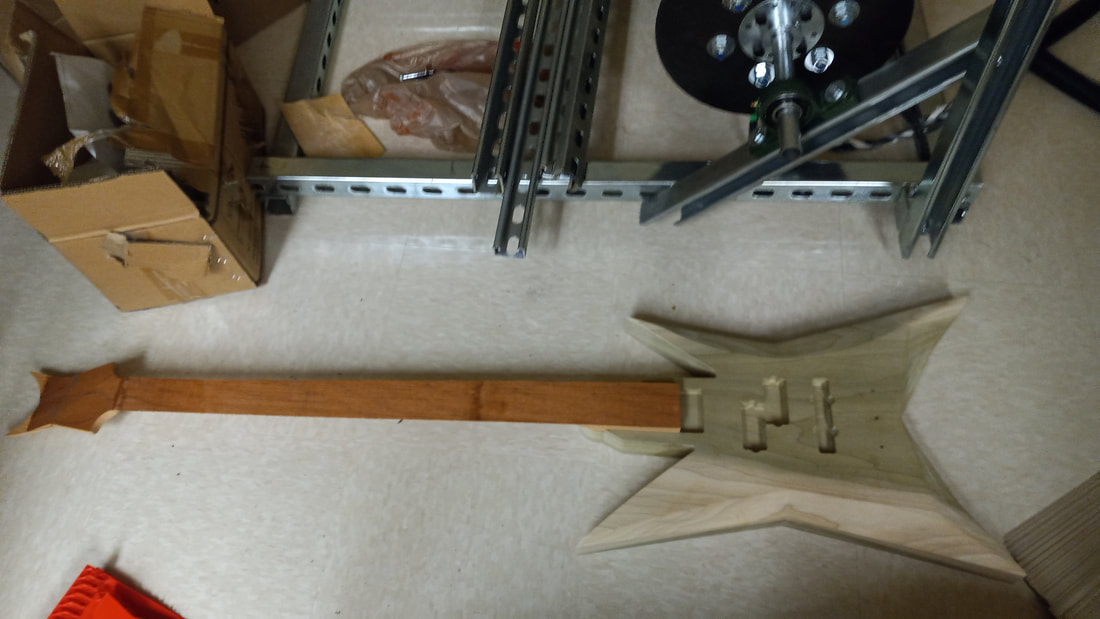
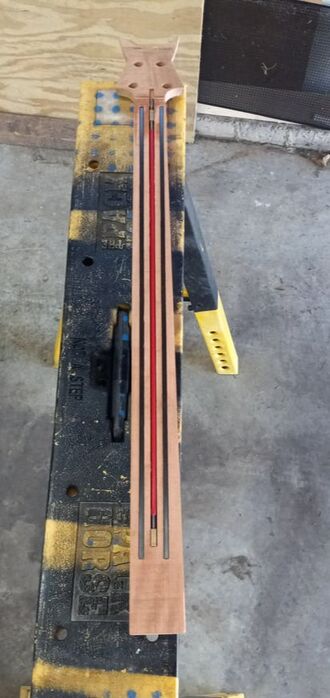
The neck cut well, nothing broke, and as an added bonus, I got to keep the ramp. For this cut we again used the tipped bit because it cut curves better, and that is what most of my neck is. Due to the stock left in the body, I couldn't get the two put together, but when laying on top of each other, it started coming together.
|
|
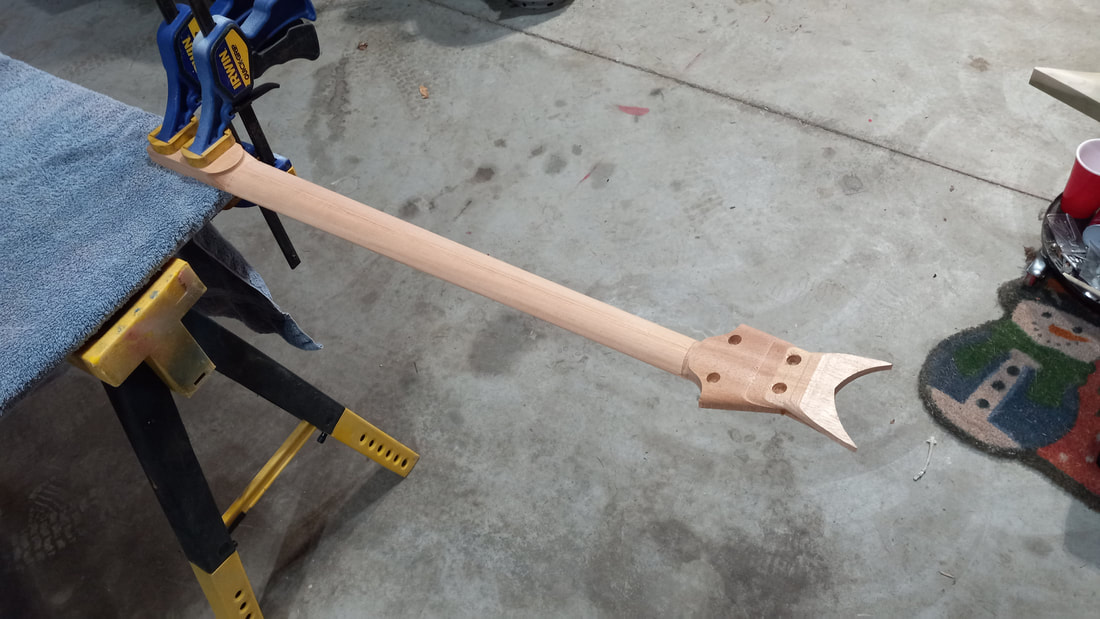
Flipped Neck
Before the next CNC cut, Mr. Willauer wanted me to sand the neck as smooth as it will be before it's covered by the fretboard. This wasn't too bad, it was just a bit scary when I had to sand the head as well. It was still holding on to the neck with just wood glue, and this didn't give me much confidence (so I waited until I was able to use the school power tools). Still I sanded it and got it smooth to the touch, but there would be more work to do after the fretboard was on.
|
|
After the sanding, I talked to Mr. Willauer about what was hopefully going to be my last cut. Sadly he said that we would need to 3D print some supports to hold the neck in place. So I got to designing, I was only able to get one on the printer before class was over. This was fine though because I have a 3D printer at home, and Fusion to design it on. Then after they were printed and ready (and after I broke a printing bed) I took them to Mr. Willauer, but he suggested that I made one last piece to hold it in place and be absolutely sure that this would work.
Finishing Acrylic
While I waited for my supports to print, I took my acrylic hole covers and started countersinking them. This was a 3/4 success, but one of my panels broke because I was just pressing and not spinning the countersink. So I re cut it on the laser and properly sunk it. This worked well and I had flush screws that didn't jut out of the body.
Electronic Installation
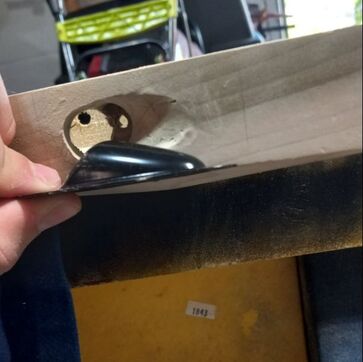
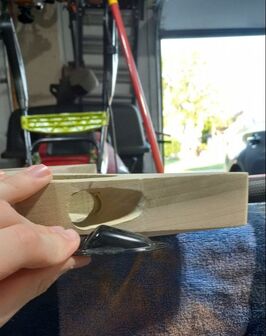
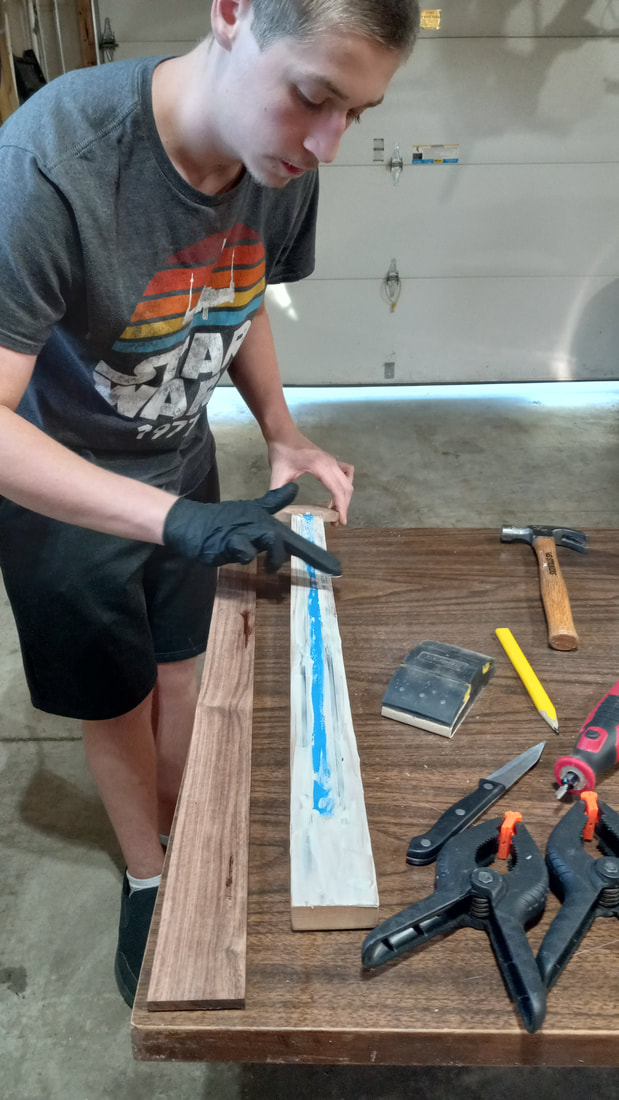
Still waiting to use the router, I worked at home in installing my electronics into their holes. First my father and I talked about our plan, and we decided to install the aux jack first. This started with my father cutting the first hole (he is quite the control freak and wouldn't let me do it) and from there I took my Dremel with it's sanding attachment and got to work in shaping.
|
|
|
This took awhile, destroyed two of my sanding circles, and filled my lungs and eyes with saw dust. In the end it all worked out and I was able to to attach by jack and I then screwed it in.
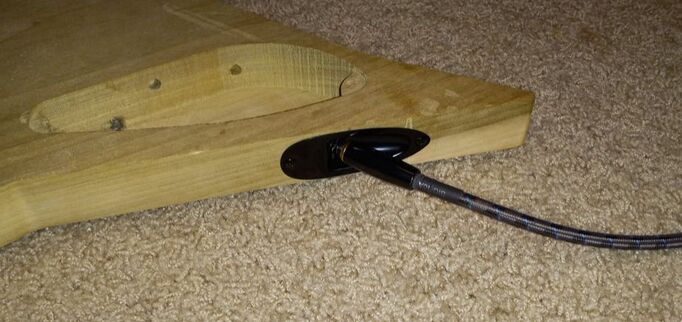
From there I attached my pick ups to my tone knobs and attempted to execute wire management, which didn't work. Anyway, I attached all my wires and connected the power. Sadly, my hole for the battery was too far away and the wires wouldn't reach it, so I would have to deal with that at another time. Luckily, my pickups worked and I hadn't somehow broken them when I sanded them.
Cutting and Designing Tone Knobs
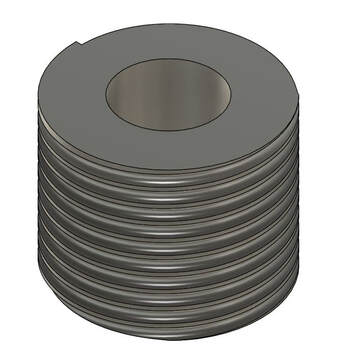
One of the last steps in my electronic process was drilling holes for my tone and volume controls. This took a while because I didn't know how I wanted to arrange the knobs or how the knobs should be designed. During the start of the project, I spent some spare time designing hypothetical knobs to cover my tone controls. These however were just hypothetical and weren't based on anything other than the controllers I had. Using these designs, I quickly designed new knobs which would cover and turn the tone and volume knobs.
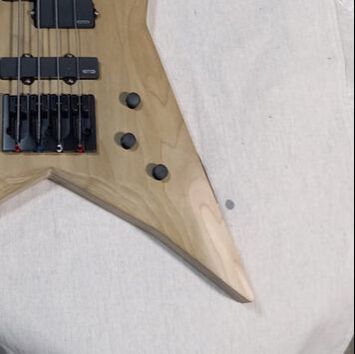
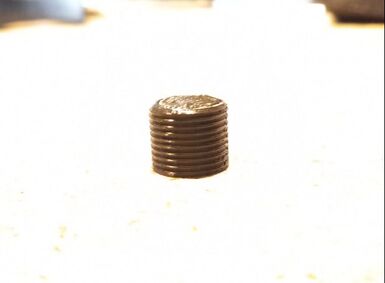
Black knob, so contrast is maxed to show it.
|
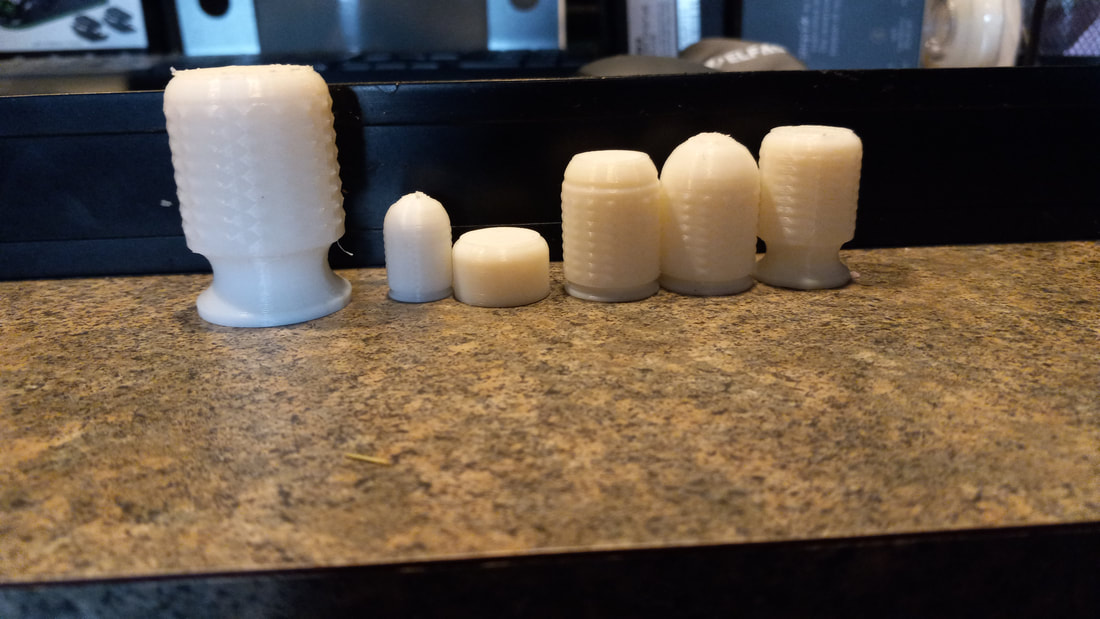
The supper small and large knobs were mistakes on my end when I resized them in the 3D printing software.
|
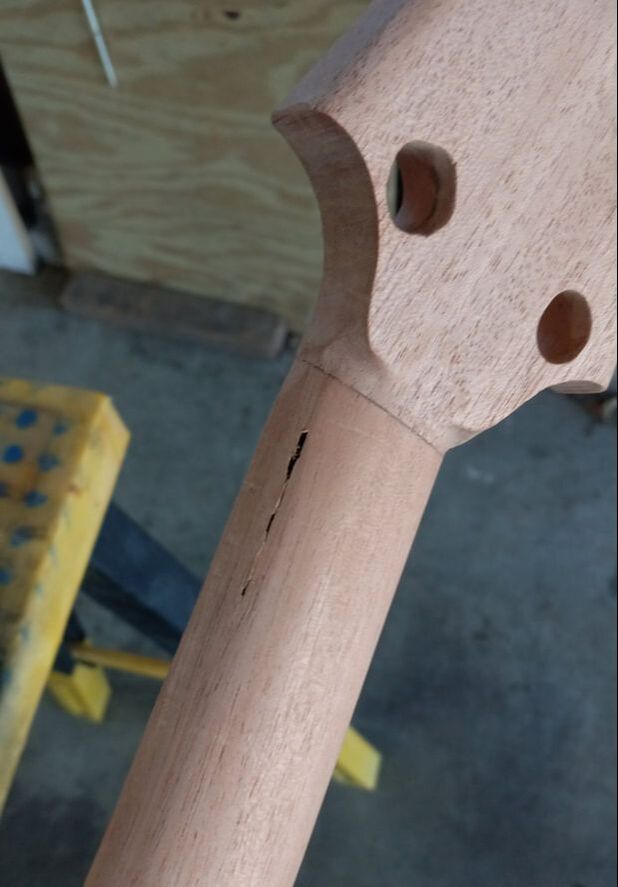
Disaster in the Neck
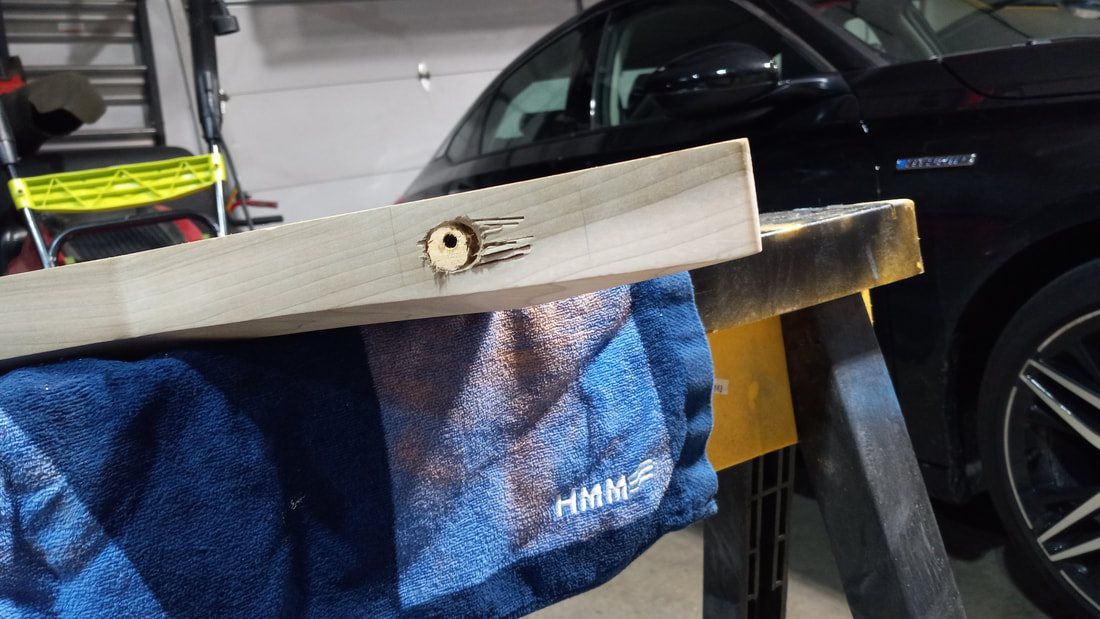
My troubles with my neck never end and even nearing the end of my project, new issues still arise. This problem came in the form of me finally being able to use the CNC router and even after all my hard work, still messing it up. Despite the 3D printed mounts I made, and all I did to attach them straight, the neck still wasn't straight and not level enough to cause issues. I think the issue lied at the big mount at the hilt, I hadn't put the neck in straight and this caused issues near the head. The cut came out crooked and one of my holes for the support rods, punctured the back of the neck and made a hole.
|
|
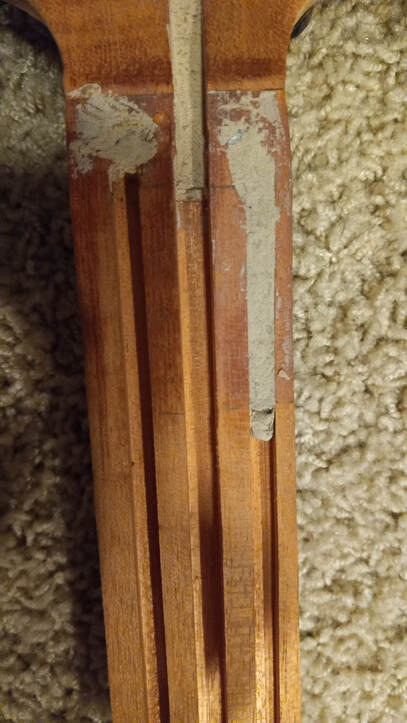
As devastating as this was, it wasn't the end of my project yet and I still had some ideas on how to save it. First I thought about coating the neck in something to cover the hole, but that would be too difficult and might have caused more problems. After some more thinking, I decided to use some wood filler and plug the hole from the inside, then cut the carbon fiber to fit the new hole. Then using a two part epoxy, I stuck the rod into place and waited for the epoxy to dry.
|
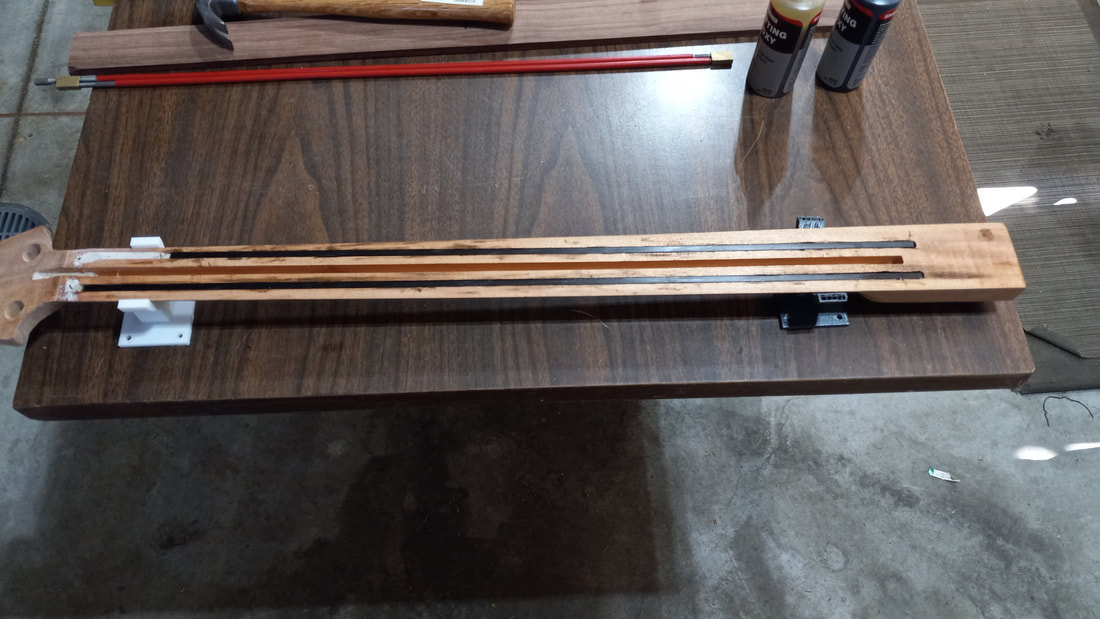
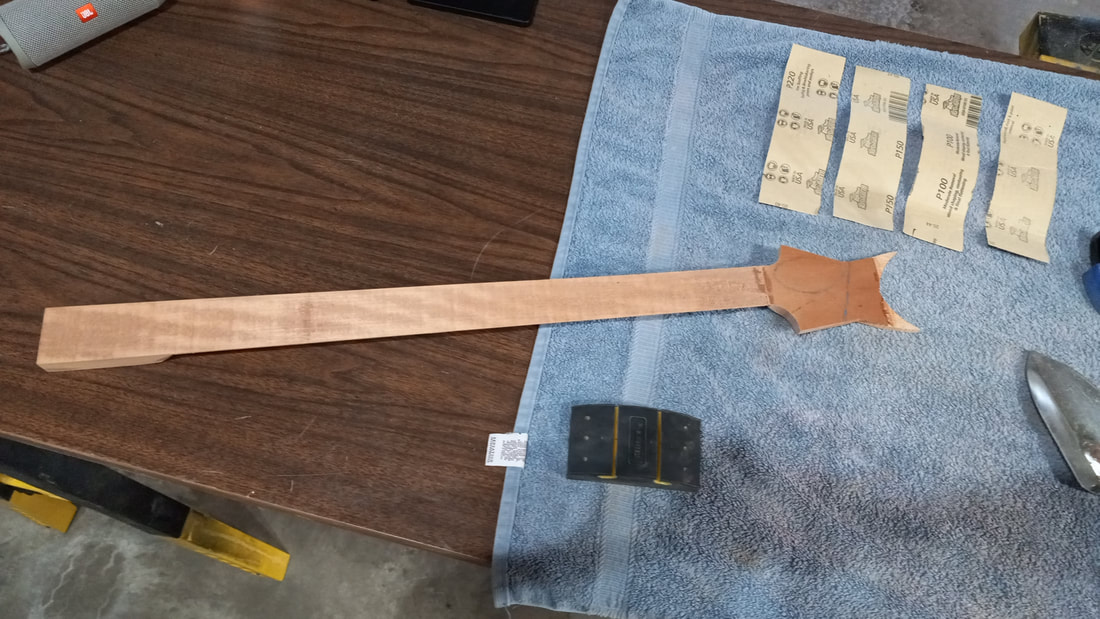
|
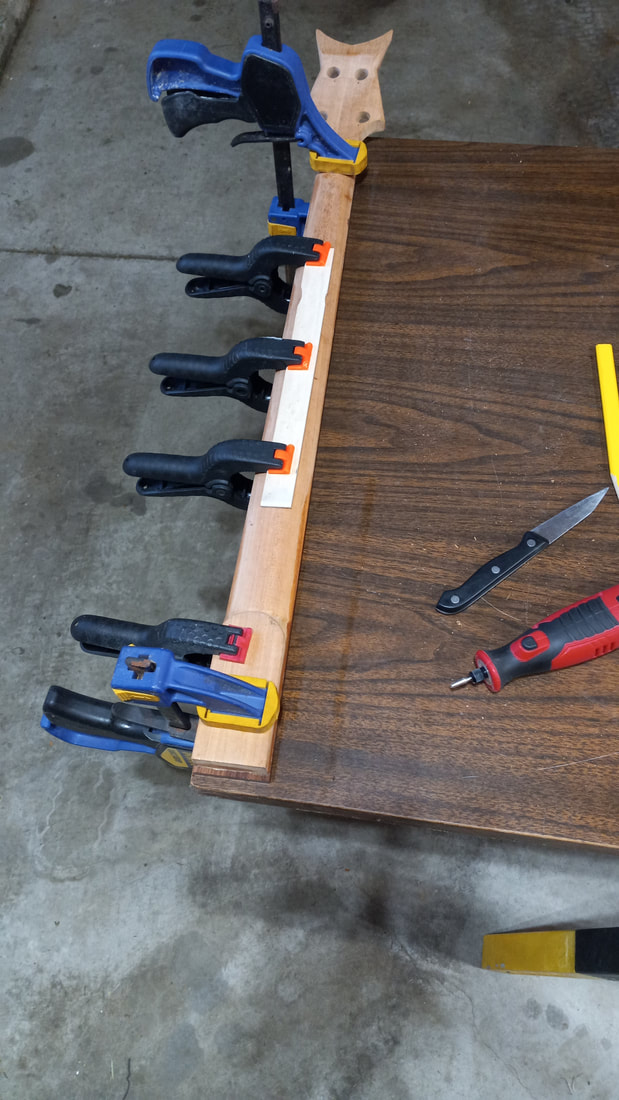
After about an hour or so of waiting, I went back to the neck and got ready for gluing the fretboard to the neck. Using some painters tape, I covered the truss rod and then used wood glue to completely cover the rest of the neck. From there I used some saw dust for grip and set the fretboard on top. The next problem came in the form of my lack of clamps to hold every part of the neck, but I had to use what I had. So I used my limited supply of only 6 clamps to tightly hold the neck and fretboard together.
|
|
Last CAD Files
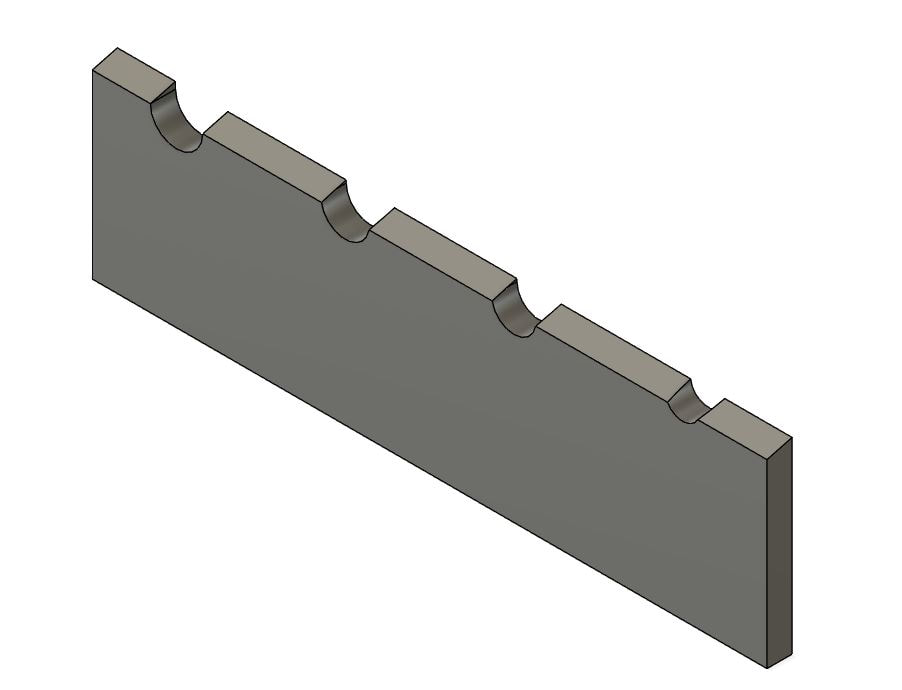
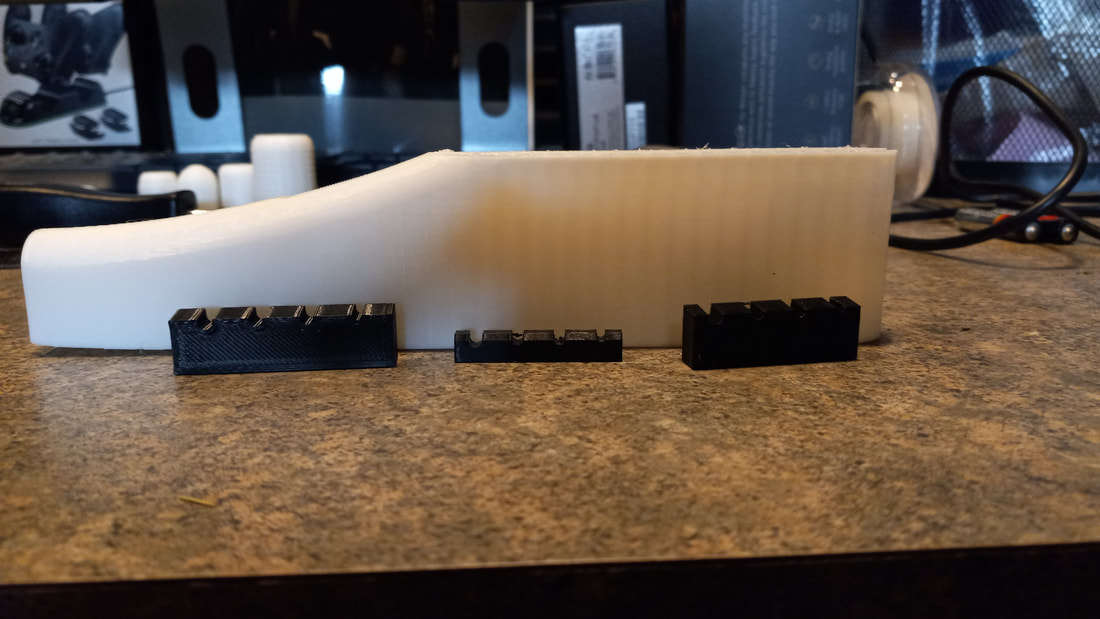
With everything else in place, I just needed to design and make one last file and get it printed. I went through four iterations, but I designed my final piece which was the nut which holds the string up just at the top of the neck. Some trial and error was needed, but I got the nut glued on by the end of the night.
|
|
Final Touches
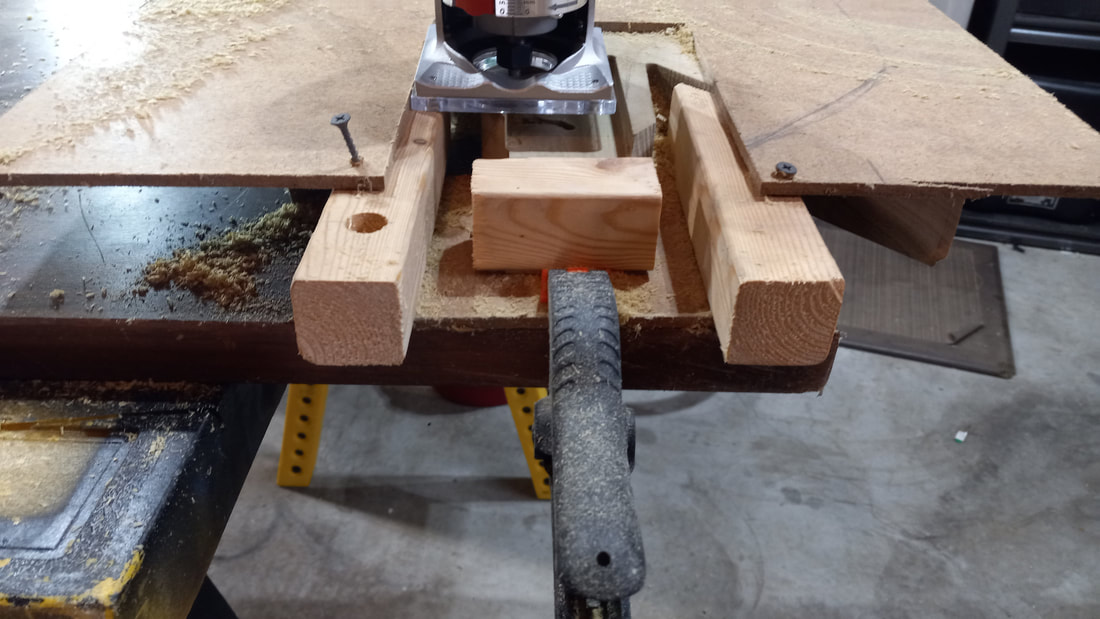
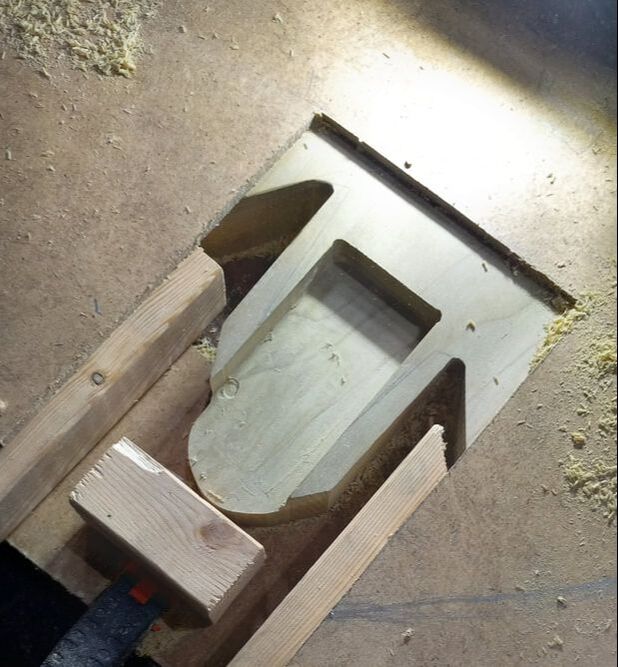
The next day, after the fretboard was glued, I had to route the hole where the neck and the body attach. This was quite difficult because the tip of the hole was too far away for the router to sit on the body and keep flat. So I had to get some other pieces of wood and other materials to make a larger surface for the router to sit on. This worked, but took a while to make and when it was time to cut, I had to work right where the sawdust and wood escaped, so my black shirt became brown.
|
|
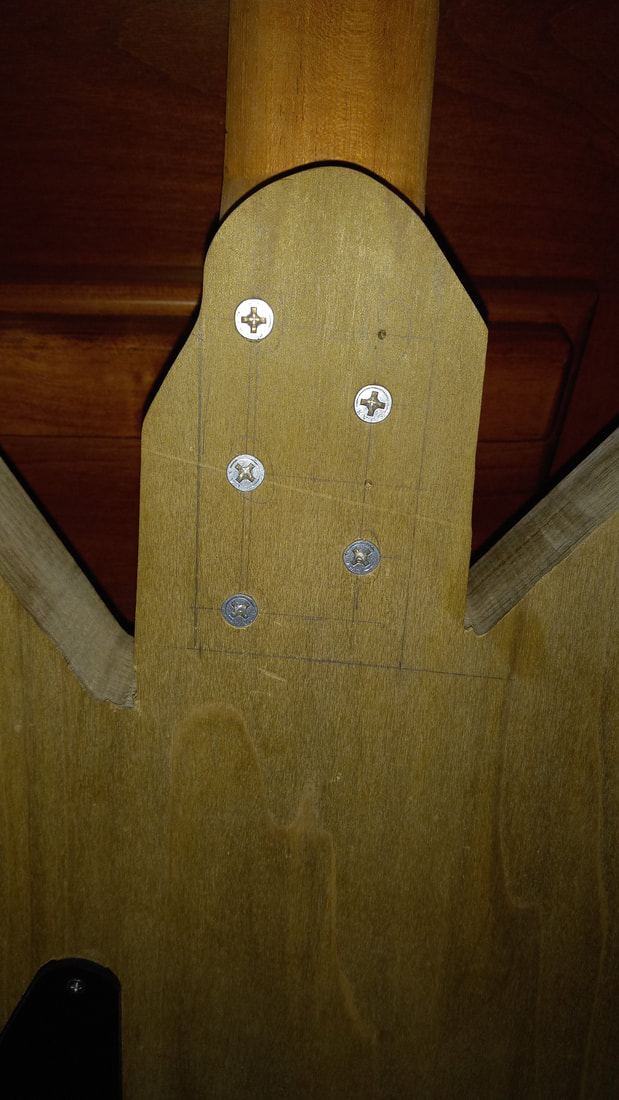
After this, I got the neck attached by using 5 screws which were counter sunk through the back of the body, going into the neck. With that, I finally had a guitar all in one piece and finally looking it too.
My next and final step was stringing the bass and getting sound out of it. The moment of truth came and when I plucked the string, I got a tangy and restricted sound. The strings were too low and hit the fretboard, not that this was an issue, I actually expected it. To solve this issue, I just had to raise the string height at the bridge and make sure the stings were higher than the fretboad. This worked and I was actually able to make some clean sound with out the string hitting anything. So I saw this as my chance to finish my bass and merely tighten the strings to the right tension so they made the right sound.
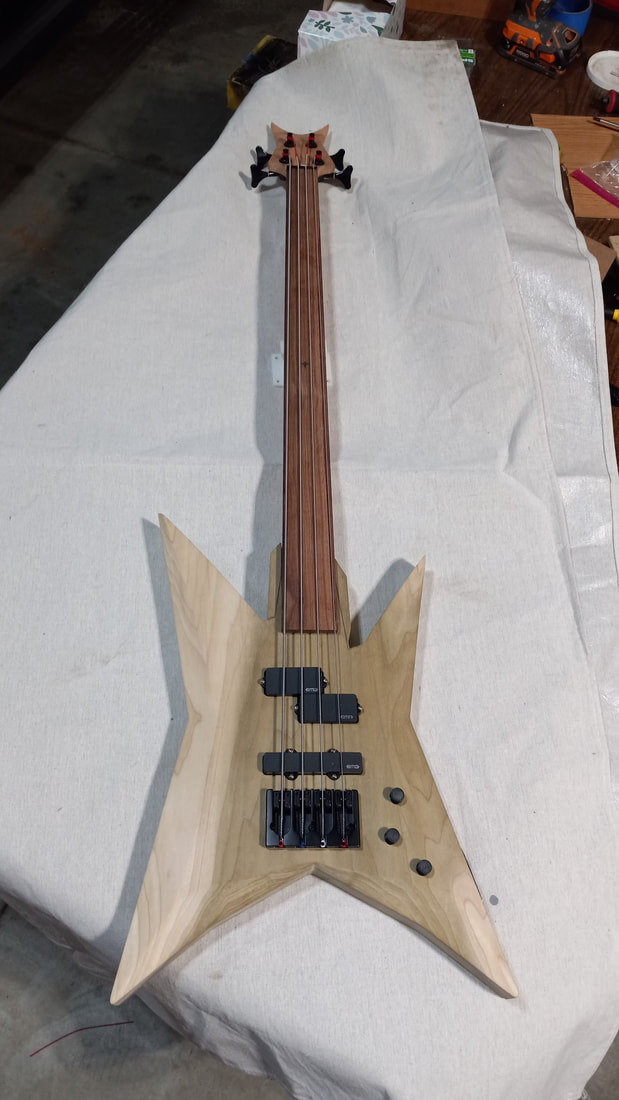
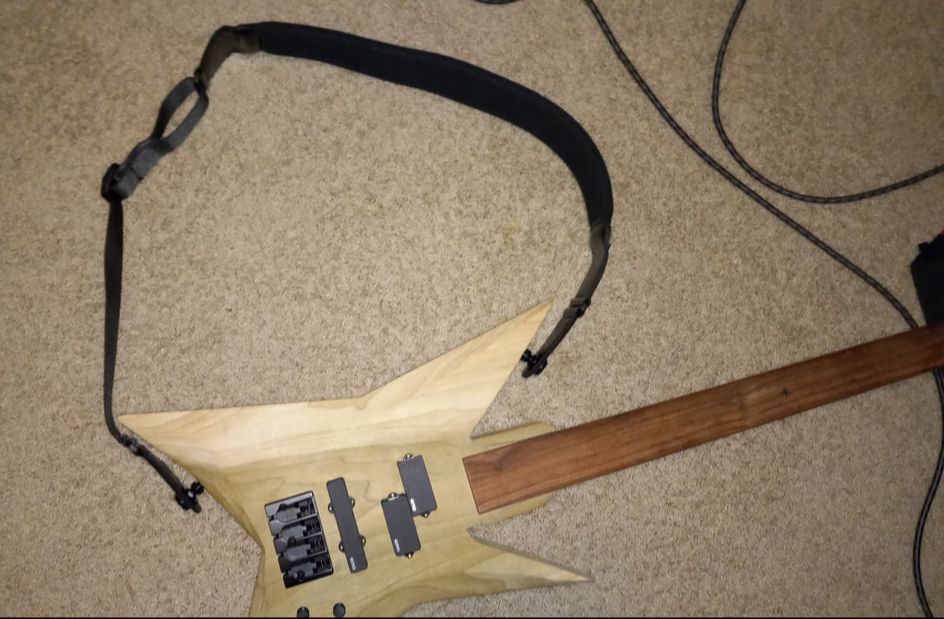
Finally I had done it, I made a guitar, I did what I set out to do, my time and effort wasn't in vein. First thing I learned was that, a fretless bass is much harder to play than one with frets. With the frets, you have a certain area where you can play a single note, but on a fretless, it's a pinpoint spot. Anywhere else and the sound is either sharper or flatter (musical terms for a slightly higher or lower pitch). Put some straps on and I can carry it anywhere and show it off anytime.
*THUNK*
Oh No...
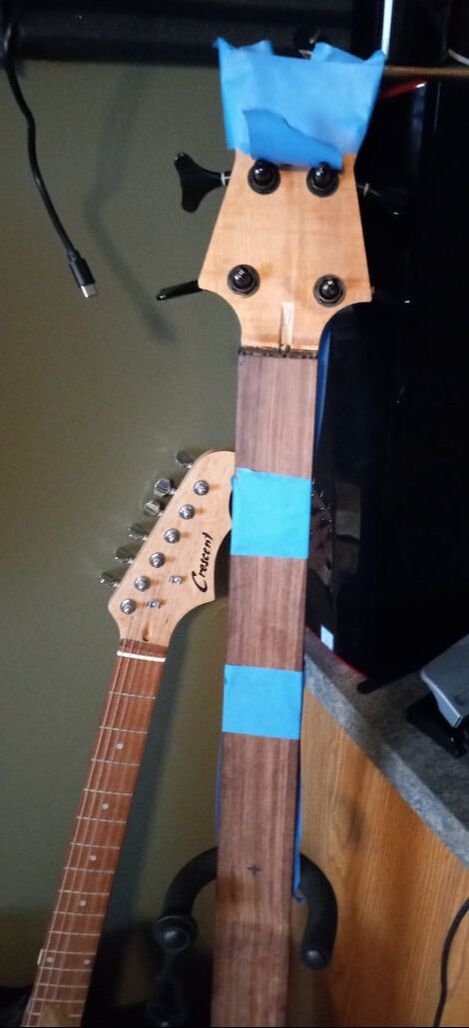
.As I was re tightening the strings because they were slowly getting loose (that's normal for new strings) I hear a thunk as the strings lose tension. Instantly I knew something broke and I quickly found what it was. At the joint where the neck and head met, the glue had finally given out and now the only thing holding the neck and head together were the two screws which I had put in earlier. So I grabbed the glue and some painters tape. For the time being I was going to make the bass work for a bit, and later I will figure out how to keep it solid later. For now it's a temporary fix which I will hopefully get to work consistently
The following video is my second test of playing my bass. I tested it before, but didn't record it because my electronics weren't set up right. So I started to fix my electronics, but the head broke during that time and I had to re-glue it and let it dry. The video is long, but I wanted to record every moment because I didn't know when it was going to break.
